Kids (and adults) love robotics. And now, by combining control boards made by these folks…
…with the free Osmosian Plain English programming language, kids (and adults) can program their robotic creations in a language they already know: English.
My 12-year-old son and I thought that automating this LEGO maze…
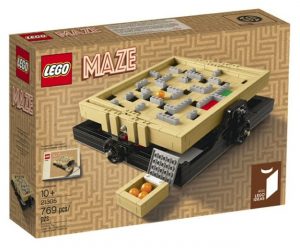
…would be a good test of the system. So we assembled the LEGO maze base as instructed. The knob on the front tilts the maze left and right; the knob on the side tilts the maze forward and back.

We then bought a control board kit from the PC-Control folks that came with battery pack, some servos, and a USB cable:

We built a LEGO sub-base to hold the battery pack and the control board, and we mounted the servos so they would mate with the knobs on the LEGO base:

Then we used the built-in Osmosian wysiwyg page editor to plan our maze pattern…

…and built the top layer of the maze to match (give or take some decorative trees and buildings):

It was then time to program. We started with a few type defintions:
A setting is a number.
A knob has a setting.
The front knob is a knob.
The side knob is a knob.
Then we added in the low-level helper routines we needed to talk to the well-documented Dynamic Link Library (DLL) provided by the PC-Control folks:
To start up the Hawk servo board:
Call “hawk.dll” “Sys_Initialise” returning a number.
To set the servos:
Call “hawk.dll” “Servo_SetServos” with 1
and the front knob’s setting and the side knob’s setting
and 0 and 0 and 0 and 0 and 0 and 0 returning a number.
To shut down the Hawk servo board:
Call “hawk.dll” “Sys_CloseAllDevices” returning a number.
Then we stuck in some mid-level helpers, to get us closer to where we wanted to be:
To center a knob:
Put 512 into the knob’s setting.
Set the servos.
To turn a knob to the left:
Put 712 into the knob’s setting.
Set the servos.
To turn a knob to the right:
Put 312 into the knob’s setting.
Set the servos.
And finally, we added the high-level routines that would serve as our official Application Programming Interface (API):
To center both knobs:
Center the front knob.
Center the side knob.
To tilt the board forward and right:
Turn the side knob to the right. Wait for 1/10 second.
Turn the front knob to the right. Wait for 1 second.
To tilt the board forward and left:
Turn the side knob to the right. Wait for 1/10 second.
Turn the front knob to the left. Wait for 1 second.
To tilt the board backward and right:
Turn the side knob to the left. Wait for 1/10 second.
Turn the front knob to the right. Wait for 1 second.
To tilt the board backward and left:
Turn the side knob to the left. Wait for 1/10 second.
Turn the front knob to the left. Wait for 1 second.
To tilt the board left and forward:
Turn the front knob to the left. Wait for 1/10 second.
Turn the side knob to the right. Wait for 1 second.
To tilt the board left and backward:
Turn the front knob to the left. Wait for 1/10 second.
Turn the side knob to the left. Wait for 1 second.
To tilt the board right and forward:
Turn the front knob to the right. Wait for 1/10 second.
Turn the side knob to the right. Wait for 1 second.
To tilt the board right and backward:
Turn the front knob to the right. Wait for 1/10 second.
Turn the side knob to the left. Wait for 1 second.
It was then easy to write the application, since all we had to say was WHAT we wanted the maze to do, rather than HOW to do it:
To do the lego maze:
Start fresh.
Start up the hawk servo board.
Center both knobs.
Write and say “MAKE SURE THE BOARD IS LEVEL, THEN PRESS ENTER”.
Wait for the enter key.
Tilt the board backward and right.
Write and say “PUT THE BALL ON THE GREEN SQUARE, THEN PRESS ENTER”.
Wait for the enter key.
Tilt the board forward and right.
Write and say “THIS IS FUN”.
Tilt the board left and forward.
Write and say “UNDER THE BRIDGE”.
Tilt the board backward and right.
Tilt the board left and backward.
Tilt the board forward and right.
Tilt the board left and forward.
Tilt the board backward and left.
Write and say “ABOUT HALF-WAY, I THINK”.
Tilt the board right and forward.
Tilt the board backward and right.
Tilt the board left and backward.
Tilt the board forward and left.
Tilt the board right and backward.
Tilt the board forward and right.
Tilt the board left and backward.
Write and say “THROUGH THE RIVER”.
Tilt the board forward and left.
Tilt the board right and backward.
Tilt the board forward and right.
Tilt the board left and forward.
Write and say “ALMOST THERE”.
Tilt the board backward and left.
Shut down the hawk servo board.
Write and say “ALL DONE”.
Write and say “COOL”.
The output on the screen, when the program is run, looks like this:

The words are spoken as they are displayed on the screen.
And the happy (and confident) aspiring engineer looks like this:

Simple, fast, flexible. Good clean stuff. Good clean fun.
